
The uMi interface can be set up in your macOS or Windows pc to your preferred presets or can be used straight out of the box with the default settings.
Use with default settings
Just connect it to your preferred mobile device, attach a microphone and you are ready to broadcast/record.
The presets are pre-configured in such a way that the button on the device switches 12V Phantom power On (blue light On) and Off ( blue light off) .
Setting-up in Apple macOS
Use System preferences to receive audio from the uMi and send audio to the computer speakers/headphones.
- Insert the uMi audio interface into a free USB port
- Open System Preferences from the top left drop-down menu
- Click the Sound icon
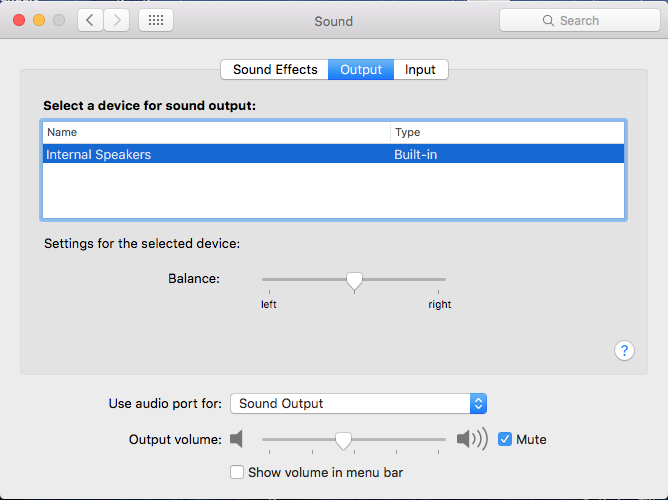
- In the Sound pane click the Output tab.
- Choose the Built-in Internal speaker.
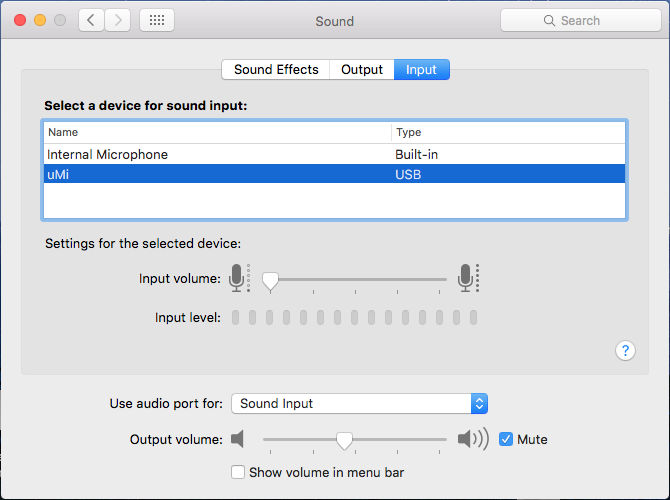
- In the Sound panel click the Input tab.
- Choose uMi
- Close the Sound preferences. You are ready to use the uMi interface.
Use the Audio MIDI Setup to change the settings of the uMi interface
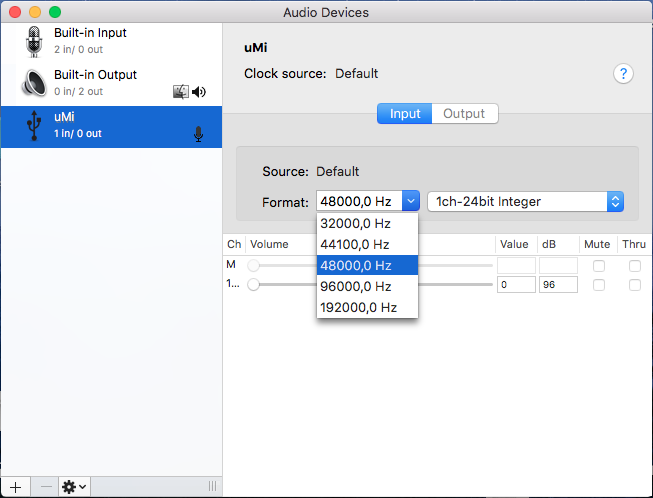
- Open the Applications folder and then the Utilities folder.
- Double click to open Audio MIDI setup.
- Select uMi from the left side of the panel.
- The sample rate and the bit-depth can be chosen. Preferred values are 48000,0 Hz and 1ch-24bit Integer.
Setting-up for Apple iOS
The uMi interface will work with Apple’s mobile hand-held devices. In order to connect the uMi to an iPhone or iPad and broadcast/record, an Apple Lightning-to-USB Camera Adapter or Camera Connection Kit is required. For more info, visit http://www. apple.com/shop.
- Plug the Camera Adapter/Connector into your Apple mobile device.
- Plug the uMi into the Camera Adaptor/Connector’s USB port.
- Select your desired mobile broadcast/record application.
- Adjust microphone volume to desired level (not valid when you lock your uMi level, see uMi Control description).
Setting-up in Windows
Use the Control Panel Sound settings to receive audio from uMi, while sending sound to the computer’s speakers:
- Insert the uMi into your computer’s USB port.
- Go to Start menu and launch Control Panel.
- Open Hardware and Sound panel.
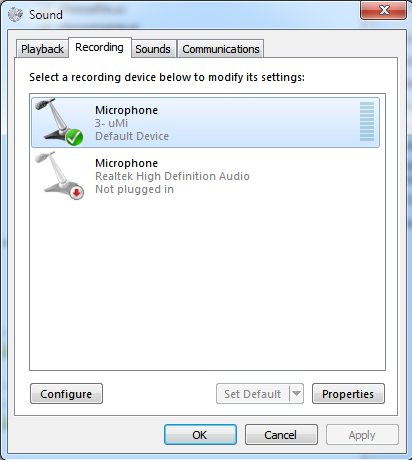
- Select Recording.
- Select the uMi as the recording device. Ensure it is the Default Device.
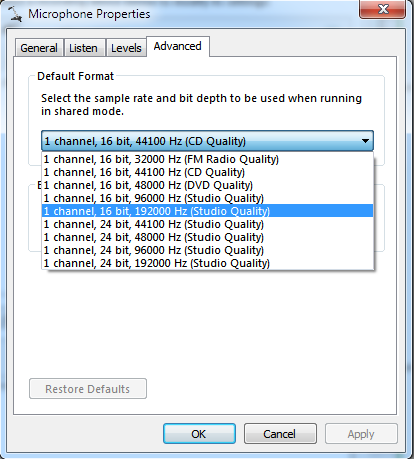
To setup advanced settings:
- Click the Properties button for more setup options.
- Click the Advanced tab. Use the drop-down menu to choose the bit depth and sample rate. Preferred value is 1 channel, 24-bit, 48000 Hz.
Setting-up for Android
The uMi interface will work with Android 6.0 mobile hand-held devices that support OTG. To connect the uMi to your Android device you will need an OTG cable compatible with your device.
- Plug the OTG Adapter/Connector into your mobile device.
- Plug the uMi into the OTG cable’s USB port.
- Select your desired mobile broadcast/record application.
- Adjust microphone volume to desired level (not valid when you lock your uMi level, see uMi Control description).